Homemade Reese’s Cups with Crispy Rice
Highlighted under: Busy Recipes
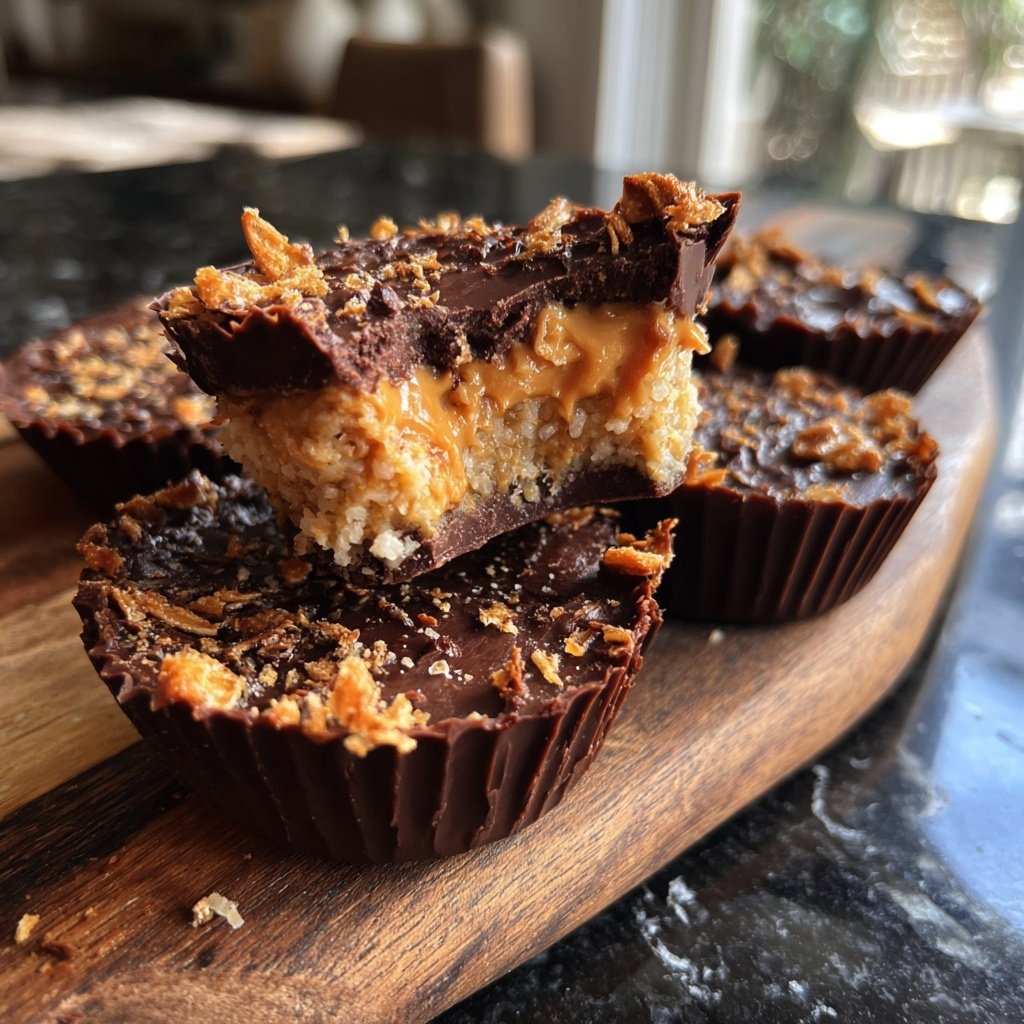
I have always loved Reese’s Cups, but making them at home with a crispy twist took my admiration to a new level. The combination of smooth peanut butter and the satisfying crunch of crispy rice creates an irresistible treat. I experimented with different chocolate coatings and found that using a blend of milk and dark chocolate balances the sweetness perfectly. Now, I can enjoy these delicious cups, knowing exactly what goes into them. Trust me, once you make them, you won't want to go back to the store-bought versions!
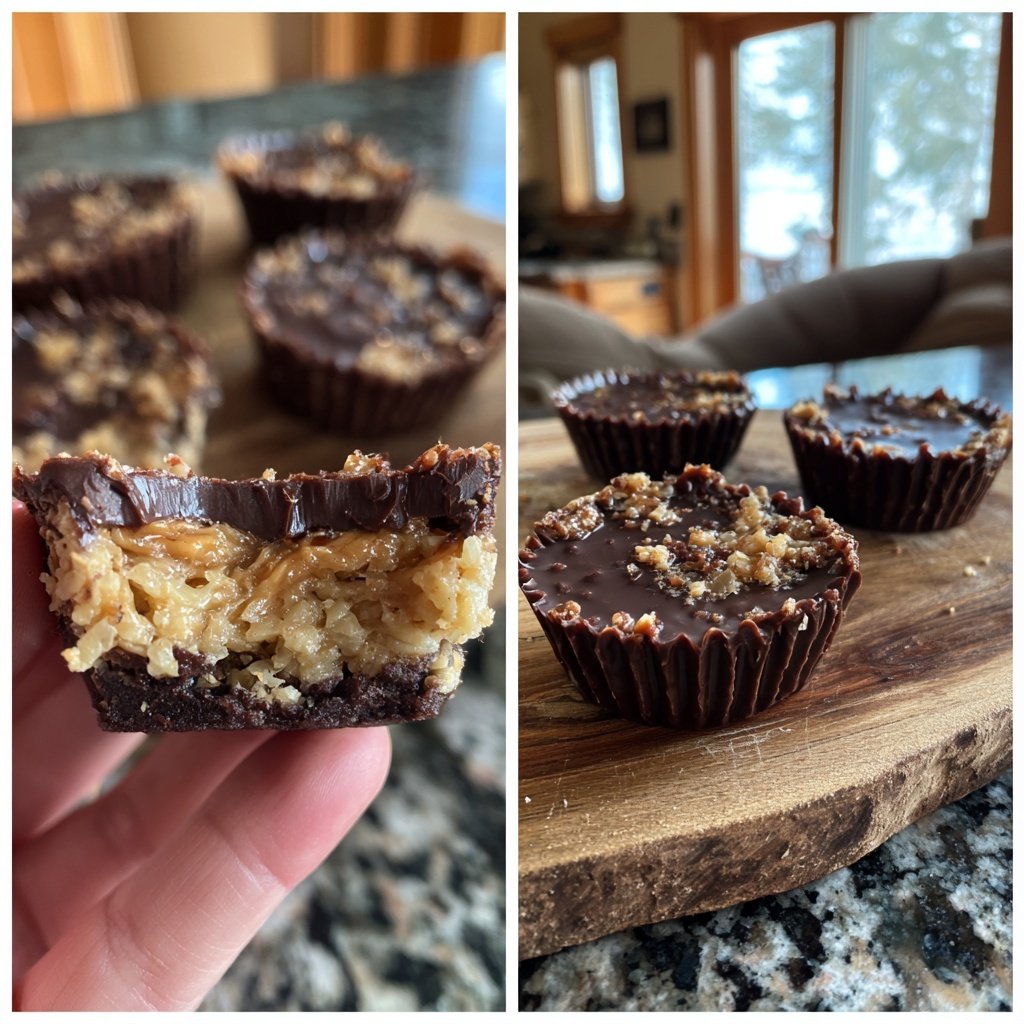
When I first tried making homemade Reese’s Cups, I wanted to elevate the classic recipe. So, I added crispy rice for texture. The result was a delightful contrast between the creamy filling and the crunchy layer. I noticed that incorporating the crispy rice made each bite even more satisfying, keeping my friends coming back for more.
Another important aspect was choosing the right chocolate. By blending milk and dark chocolate, I achieved that perfect sweetness without being overwhelming. This balance is key, and it's a detail that truly makes these cups stand out!
Why You'll Love This Recipe
- Rich peanut butter flavor with a crunchy, crispy texture
- Easy to make with just a few simple ingredients
- Perfect for sharing or as a sweet indulgence
Mastering the Chocolate Coating
Getting the chocolate coating right is crucial for achieving that classic Reese's texture. When melting the chocolate, microwave it in short bursts of 30 seconds, stirring in between to prevent overheating. The chocolate should be glossy and smooth, with no lumps. If you overheat the chocolate, it can seize up, becoming grainy. If this happens, try adding a small splash of vegetable oil to smooth it out.
For an extra layer of flavor, consider adding a teaspoon of vanilla extract to the melted chocolate. This addition enhances the richness and makes the chocolate taste more sophisticated. You can also experiment with different types of chocolate, such as adding a sprinkle of sea salt to enhance the flavor profiles.
Crispy Rice Cereal: A Game Changer
The crispy rice cereal not only adds texture but also balances the creaminess of the peanut butter. Make sure to incorporate the cereal gently, so it remains crunchy. If you prefer a thicker coating, you can increase the cereal by half a cup without disrupting the overall recipe. Just be cautious not to add too much, or the balance of ingredients will be thrown off.
If you're looking for a gluten-free option, ensure that your crispy rice cereal is labeled gluten-free. This will make your homemade Reese's Cups accessible to those with dietary restrictions without compromising the delightful crunch.
Ingredients
For the cups
- 1 cup creamy peanut butter
- 1/2 cup powdered sugar
- 2 cups crispy rice cereal
- 1 1/2 cups milk chocolate chips
- 1/2 cup dark chocolate chips
Make sure all ingredients are at room temperature for better mixing.
Instructions
Prepare the Peanut Butter Mixture
In a mixing bowl, blend together creamy peanut butter and powdered sugar until smooth. Fold in the crispy rice cereal until evenly combined.
Melt the Chocolate
In a microwave-safe bowl, combine milk chocolate chips and dark chocolate chips. Microwave in 30-second intervals, stirring in between, until melted and smooth.
Assemble the Cups
Line a muffin pan with cupcake liners. Pour a small layer of the melted chocolate into each liner, followed by a generous scoop of the peanut butter mixture. Top with more melted chocolate to cover.
Chill and Set
Refrigerate the cups for at least 30 minutes until the chocolate hardens. Enjoy your homemade Reese’s Cups with Crispy Rice!
Once set, the cups can be stored in an airtight container in the refrigerator.
Pro Tips
- For an extra touch, try sprinkling a little sea salt on top of the chocolate before it sets for an added flavor contrast.
Storing Your Homemade Treats
After you've made your Reese’s Cups, proper storage is essential to maintain their texture and flavor. Store them in an airtight container in the refrigerator for up to two weeks. The cool temperature helps keep the chocolate firm, ensuring a satisfying bite each time you reach for one.
If you want to store them for a longer period, these cups freeze beautifully. Place them in a single layer in a sealed freezer bag, separating layers with parchment paper to prevent sticking. They can be frozen for up to three months. When you're ready to indulge, simply let them thaw in the refrigerator before enjoying.
Customization Options
Feel free to customize your Reese's Cups based on your preferences! For a twist, consider mixing in some crushed nuts or mini chocolate chips into the peanut butter mixture for added texture and flavor. If you're feeling adventurous, you can also substitute almond butter or cashew butter for a unique nutty flavor.
For a dessert with a hint of spice, incorporate a pinch of cinnamon or a dash of cayenne pepper into the peanut butter mix. This enhances the flavor and adds an unexpected warmth that pairs beautifully with the sweetness of the chocolate.
Questions About Recipes
→ Can I use natural peanut butter?
Yes, but keep in mind that it may change the texture slightly as natural peanut butter is typically more runny.
→ How should I store the Reese’s Cups?
Store them in an airtight container in the refrigerator to keep them fresh.
→ Can I substitute the crispy rice?
You can use crushed pretzels or graham crackers for a different crunch.
→ How long do these last?
They should last about a week if stored properly in the refrigerator.
Homemade Reese’s Cups with Crispy Rice
Created by: Wendy Ashbourne
Recipe Type: Busy Recipes
Skill Level: Intermediate
Final Quantity: 12 cups
What You'll Need
For the cups
- 1 cup creamy peanut butter
- 1/2 cup powdered sugar
- 2 cups crispy rice cereal
- 1 1/2 cups milk chocolate chips
- 1/2 cup dark chocolate chips
How-To Steps
In a mixing bowl, blend together creamy peanut butter and powdered sugar until smooth. Fold in the crispy rice cereal until evenly combined.
In a microwave-safe bowl, combine milk chocolate chips and dark chocolate chips. Microwave in 30-second intervals, stirring in between, until melted and smooth.
Line a muffin pan with cupcake liners. Pour a small layer of the melted chocolate into each liner, followed by a generous scoop of the peanut butter mixture. Top with more melted chocolate to cover.
Refrigerate the cups for at least 30 minutes until the chocolate hardens. Enjoy your homemade Reese’s Cups with Crispy Rice!
Extra Tips
- For an extra touch, try sprinkling a little sea salt on top of the chocolate before it sets for an added flavor contrast.
Nutritional Breakdown (Per Serving)
- Calories: 220 kcal
- Total Fat: 15g
- Saturated Fat: 5g
- Cholesterol: 0mg
- Sodium: 100mg
- Total Carbohydrates: 24g
- Dietary Fiber: 1g
- Sugars: 18g
- Protein: 4g