Homemade Reese’s Cups with Crispy Rice
Highlighted under: Busy Recipes
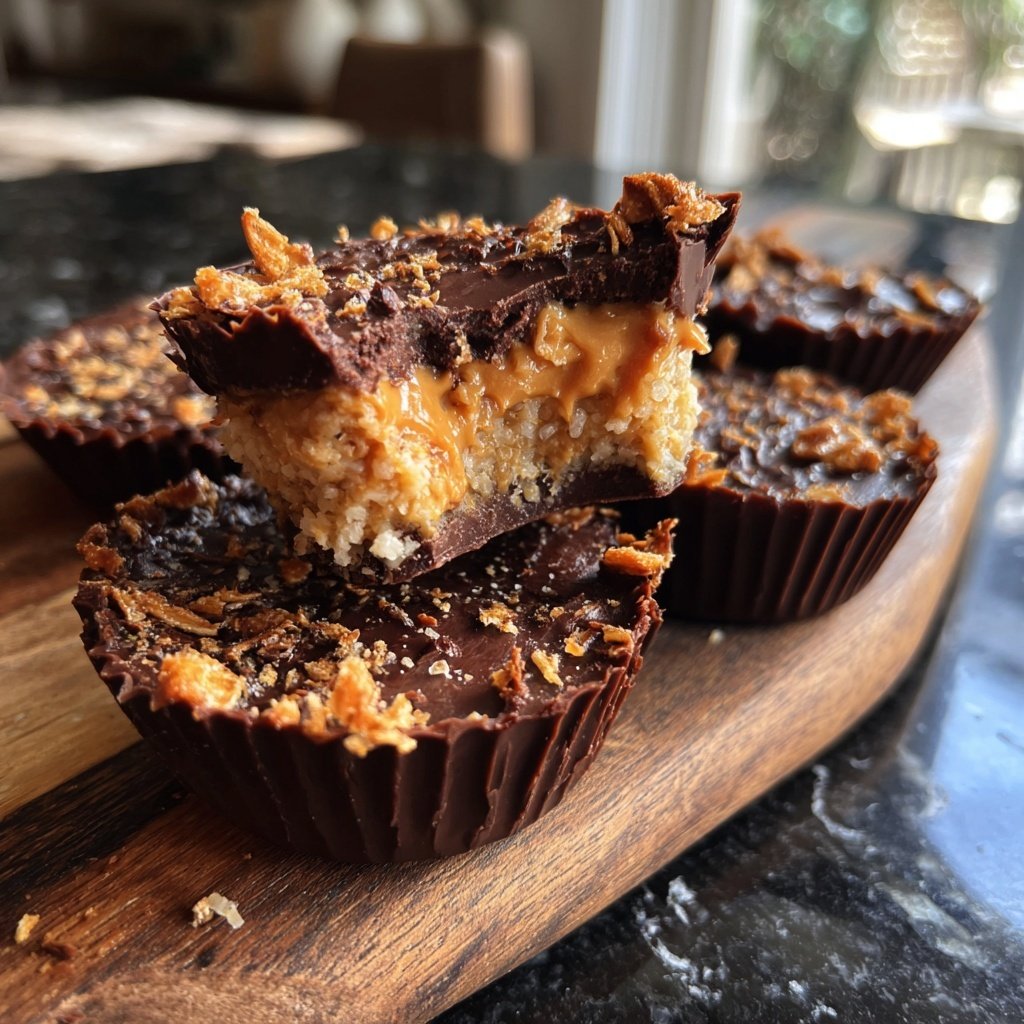
I love making these homemade Reese’s Cups with a twist of crispy rice. There’s something magical about the combination of creamy peanut butter, rich chocolate, and that delightful crunch. I created this recipe for my friends who enjoy a snack that sits between indulgent and playful. The crispy rice brings an unexpected texture that keeps you reaching for more. Perfect for movie nights or when I want to impress guests with a creative dessert, these cups encompass the best of both worlds. Let's dive into making these delicious treats together!

When I first tried making these homemade Reese's Cups, I was amazed by how simple yet delicious they turned out. Adding crispy rice to the mix was a game-changer—I wanted that extra crunch to elevate the classic texture. It took some experimenting with the chocolate melting point, but now I’ve got it perfectly smooth.
One tip I discovered during my process is to let the chocolate set in the fridge for a shorter period, which makes it easier to pop out of the molds without breaking. This recipe has quickly become a favorite in my household!
Why You'll Love This Recipe
- Rich chocolate flavor paired with a crunch of crispy rice
- Creamy peanut butter center that's utterly satisfying
- Perfect for sharing or keeping all to yourself!
Perfecting Your Chocolate Cups
When melting chocolate chips with coconut oil, it's crucial to do so gently to avoid scorching the chocolate. Microwave in 30-second bursts at medium power, stirring well after each interval. You're looking for a smooth, glossy texture that indicates the chocolate is ready for use. If the mixture seems too thick, a bit more coconut oil can help achieve the desired pourable consistency.
Using a muffin tin is a great way to create uniformly sized cups. Make sure the muffin tin is clean and dry before adding chocolate. To accurately gauge how much chocolate to pour in, aim for about a tablespoon per cup to ensure there's enough to cover the base and sides. A simple silicone muffin liner can make removing the cups easier later on.
While the initial layer of chocolate is setting, it’s a good opportunity to tidy up your workspace and prepare the peanut butter filling. This enables the melted chocolate to cool properly so it solidifies well, preventing any mixing of ingredients later. A cold surface can also help solidify your chocolate before you add the peanut butter filling.
Crafting the Creamy Peanut Butter Filling
For the filling, using creamy peanut butter is essential as it provides a smooth texture that contrasts beautifully with the crunchy crispy rice. If you prefer a healthier option or a different flavor, almond or cashew butter can be substituted, though the texture might slightly vary. Just ensure it's creamy enough to mix well with powdered sugar.
Mix the peanut butter, powdered sugar, and crispy rice until the ingredients are well incorporated. This step is crucial; if the mixture is too dry, add a teaspoon of melted coconut oil to enhance the moisture without compromising flavor. The crispy rice offers a delightful crunch, so ensure it’s evenly distributed throughout the filling for consistent texture in every bite.
Once you’ve made the filling, it's important to act quickly to avoid it hardening. If the filling cools too much, it can become difficult to work with. Use a small cookie scoop for portioning into each chocolate cup, ensuring even distribution and a uniform look. Smooth the filling to create a flat surface; this prevents the top chocolate layer from unsightly bulges.
Storing and Serving Suggestions
These homemade Reese’s Cups with crispy rice can be stored in an airtight container, preferably in the refrigerator, for up to two weeks. If you'd like to freeze them for a longer shelf life, lay them on a parchment-lined plate to freeze individually before transferring to a freezer-safe bag. This prevents sticking and allows you to enjoy them straight from the freezer.
Serving these treats at parties can be a fun and interactive experience. Present them on a decorative platter, or even add some colorful sprinkles for a festive touch. You can also serve them alongside a scoop of vanilla ice cream for a delightful dessert combo, or pair with a rich hot chocolate for a warm, indulgent treat.
For an extra touch, consider drizzling melted chocolate over the top after the cups have set for a gourmet finish, or sprinkle a pinch of sea salt for a sweet-and-salty flavor contrast. Experimenting with different toppings or flavorings, like crushed nuts or flavored extracts in the peanut butter, can add a personalized touch to your creation and impress your guests.
Ingredients for Homemade Reese’s Cups with Crispy Rice
For the Chocolate Cups
- 1 1/2 cups milk chocolate chips
- 1/4 cup coconut oil
For the Peanut Butter Filling
- 1 cup creamy peanut butter
- 1/4 cup powdered sugar
- 1/2 cup crispy rice cereal
Combine the ingredients in a bowl and get ready to build your cups!
Directions
Melt the Chocolate
In a microwave-safe bowl, combine the milk chocolate chips and coconut oil. Heat in 30-second intervals, stirring in between until the mixture is smooth.
Prepare the Molds
Spoon a small amount of the melted chocolate into each cup of a muffin tin, covering the bottom. Place in the refrigerator for 10 minutes to set.
Make the Filling
In a bowl, mix the peanut butter, powdered sugar, and crispy rice cereal until well combined.
Assemble the Cups
Remove the chocolate cups from the refrigerator. Add a scoop of the peanut butter mixture into each cup and smooth it out. Top with the remaining melted chocolate to cover the filling.
Chill to Set
Return the molds to the refrigerator for another 15 minutes or until the chocolate has fully set.
Serve and Enjoy
Once set, gently remove the cups from the molds and enjoy your homemade Reese’s Cups with a crispy twist!
These cups are best enjoyed fresh but can be stored in an airtight container.
Pro Tips
- Keep the chocolate at a low temperature while working to prevent it from hardening too quickly. Experiment with different types of chocolate for varying flavors.
Troubleshooting Common Issues
If your chocolate hardens too quickly and becomes difficult to work with, it may have been exposed to cooler temperatures. Try gently reheating it while stirring in a bit of coconut oil to restore its pliability. Alternatively, ensure you're working in a warm environment, as chocolate behaves better at slightly elevated temperatures.
If the chocolate does not set properly, it may not have been heated sufficiently during the melting process or mixed correctly with the coconut oil. Revisit this step by melting both components together until fully combined and smooth. Remember, the solid chocolate layer needs to completely seal the filling to keep moisture in and enhance texture.
For chocolate cups that stick to the molds, silicone molds are a great investment, as they help with easy removal. If you're using a muffin tin, ensure you coat it evenly with cooking spray or line each cup with paper liners before adding chocolate to prevent sticking.
Variations and Dietary Swaps
For a dairy-free option, swap out milk chocolate chips for dairy-free chocolate chips without compromising on flavor. The same goes for the coconut oil; simply use a neutral oil if you're looking to keep things nut-free or if there's a coconut allergy in your circle.
You can experiment with different textures by substituting crispy rice cereal with crushed pretzels or chopped nuts for an added crunch. If you're feeling adventurous, try infusing your peanut butter with flavors such as cinnamon or vanilla to give the filling a unique twist each time you make these cups.
If you desire a lower-sugar version, reduce the powdered sugar in the peanut butter filling or substitute with a sugar alternative like stevia or erythritol. Just keep in mind that each sweetener behaves differently, so you might need to adjust the other liquid ingredients accordingly to maintain the filling's texture.
Questions About Recipes
→ Can I use dark chocolate instead of milk chocolate?
Absolutely! Dark chocolate will give a richer flavor and pairs well with the sweet peanut butter.
→ How do I store the leftover cups?
Store them in an airtight container in the fridge for up to a week.
→ Can I make these vegan?
Yes! Substitute the chocolate chips with vegan chocolate and use a nut-free butter for the filling.
→ Can I add other ingredients to the filling?
Feel free to mix in chopped nuts, shredded coconut, or even some vanilla extract for added flavor!
Homemade Reese’s Cups with Crispy Rice
Created by: Wendy Ashbourne
Recipe Type: Busy Recipes
Skill Level: Intermediate
Final Quantity: 12 cups
What You'll Need
For the Chocolate Cups
- 1 1/2 cups milk chocolate chips
- 1/4 cup coconut oil
For the Peanut Butter Filling
- 1 cup creamy peanut butter
- 1/4 cup powdered sugar
- 1/2 cup crispy rice cereal
How-To Steps
In a microwave-safe bowl, combine the milk chocolate chips and coconut oil. Heat in 30-second intervals, stirring in between until the mixture is smooth.
Spoon a small amount of the melted chocolate into each cup of a muffin tin, covering the bottom. Place in the refrigerator for 10 minutes to set.
In a bowl, mix the peanut butter, powdered sugar, and crispy rice cereal until well combined.
Remove the chocolate cups from the refrigerator. Add a scoop of the peanut butter mixture into each cup and smooth it out. Top with the remaining melted chocolate to cover the filling.
Return the molds to the refrigerator for another 15 minutes or until the chocolate has fully set.
Once set, gently remove the cups from the molds and enjoy your homemade Reese’s Cups with a crispy twist!
Extra Tips
- Keep the chocolate at a low temperature while working to prevent it from hardening too quickly. Experiment with different types of chocolate for varying flavors.
Nutritional Breakdown (Per Serving)
- Calories: 380 kcal
- Total Fat: 26g
- Saturated Fat: 15g
- Cholesterol: 195mg
- Sodium: 85mg
- Total Carbohydrates: 32g
- Dietary Fiber: 3g
- Sugars: 24g
- Protein: 6g